Streamline Software Development with Git
You are going to work on a new software project, and you want to be able to quickly develop and release new versions of your application using a well-structured development workflow. We will walk through a streamlined workflow using Git that’s inspired by the Trunk Based Development branching strategy.
The goal of our development team is to have a single source of truth for stable and production ready code, the master branch. Every commit on the master branch must be well-tested using an automated pipeline and should be considered as a candidate for a production release. By using this strategy you will have a linear history of the versions of your released application, and be able to quickly rollback to a particular one if necessary.
Initial Commit
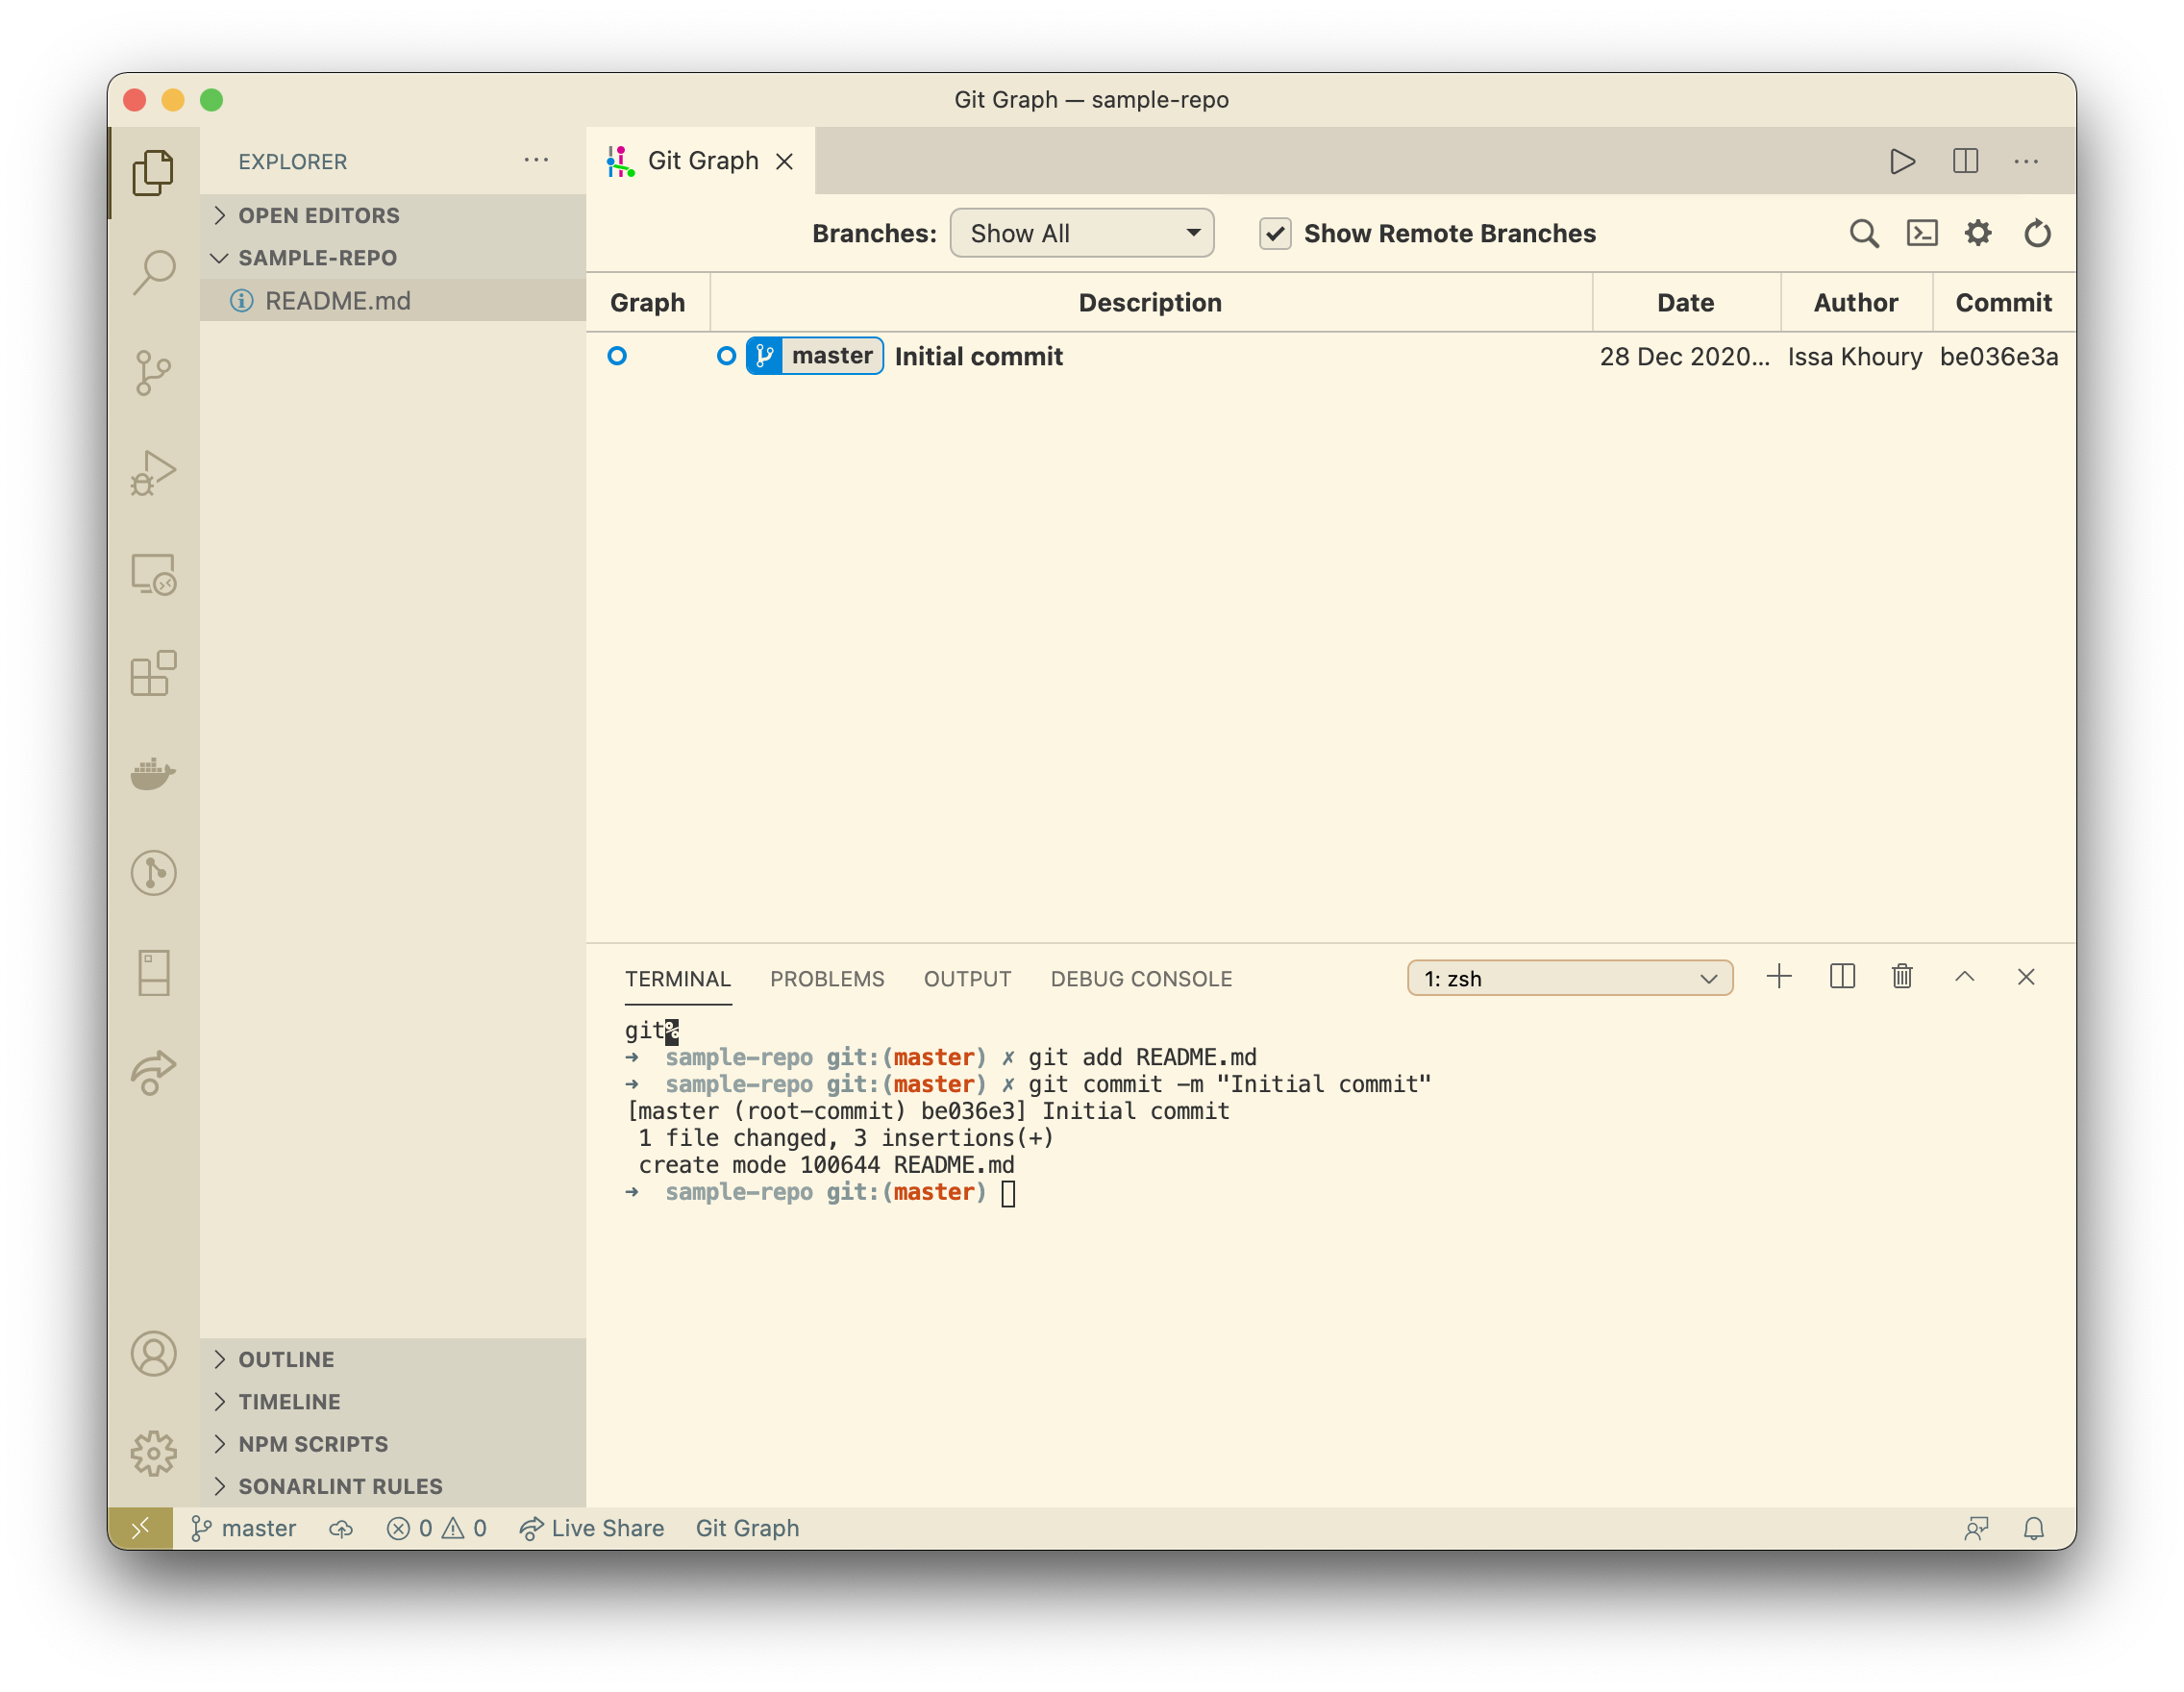
Start by creating a new folder for your project and initializing it with an empty git repository. It is important to add a description about the purpose and intended use of the project. Add a README.md file that contains your project’s name and a one-line description along with any skeleton folder structure you need. Then, stage your changes and create your Initial commit.
First Feature
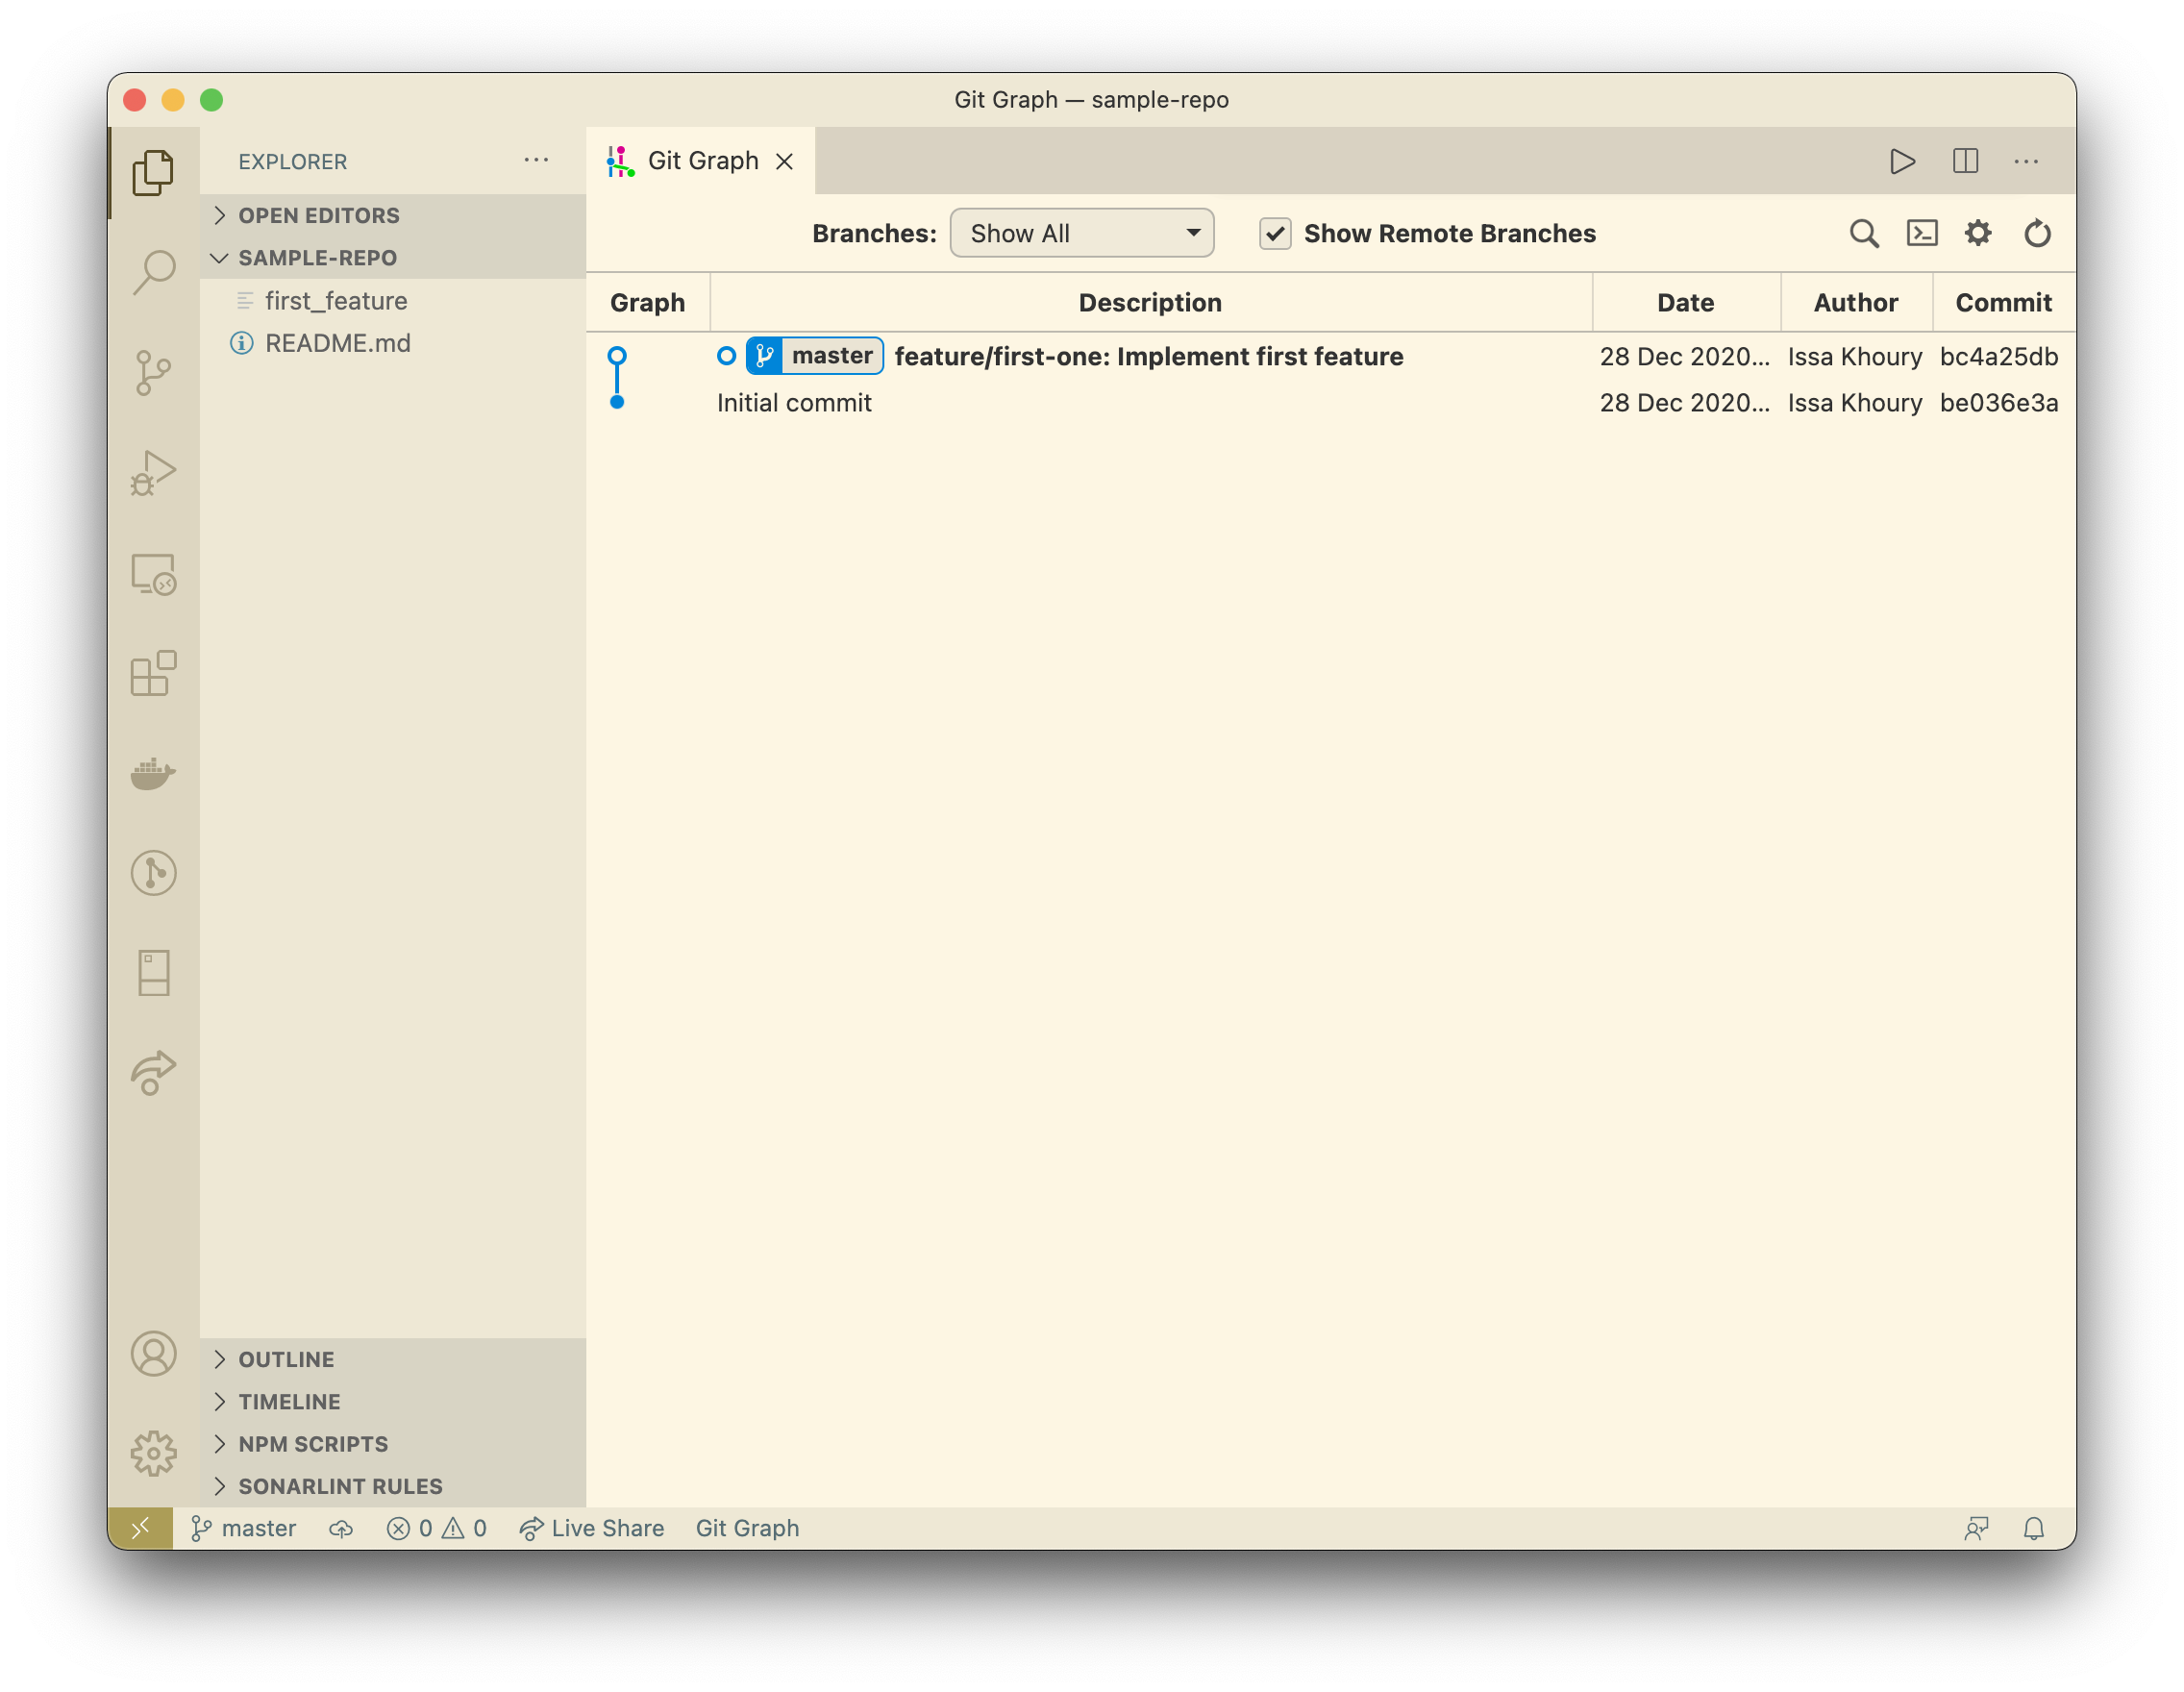
After planning the first feature with your team, you decide to start implementing it. The feature should be small enough for it to be completed in a short amount of time (at most a couple of days) and meaningful enough to deliver value on its own. In order to iterate quickly and minimize the overhead of coordinating changes across your team, be sure to only use short lived feature branches that are regularly (at least daily) updated with the latest changes from master. So, you branch out from master and start working on your new feature/first-one branch. As a suggestion, if your feature can be broken down into smaller sub-tasks that can be developed independently, then break down your branches into feature/first-one/subtask-1 feature/first-one/subtask-2 etc… while respecting the branch by abstraction strategy.
Branch Name: You might already be using an issue tracker such as Jira. Then, you can use your Jira ticket number as the branch name. The tickets will mirror the feature branches in the repository.
Here is a hypothetical example of a feature to help illustrate this workflow.
In order to implement the new menu filters feature, we should figure out how to divide it into sub-tasks that can be worked on, integrated, and potentially rolled back independently. We could branch in succession as follows:
feature/menu-filters/data-modelfeature/menu-filters/text-searchfeature/menu-filters/date-filterfeature/menu-filters/sorting
The combination of these subtasks completes the menu filters user story. Each one can be developed and merged back into master independently. Other collaborators can quickly catch up with our code changes without going through merge hell. In addition, you will receive early feedback from your tests and users.
Finally, you submit a pull request for your colleagues to review and approve your changes. There are several strategies that can be used when integrating changes into master. To preserve a clean and linear branch history, make sure to always squash your commits before merging and avoid creating a second merge commit. Usually, your version control software (e.g GitHub, GitLab, Bitbucket…) can reasonably handle this type of merge for you and automatically add the branch name to the title of the commit message. It can also delete the feature branch after the changes are merged and the PR is closed.
Note: Sync your feature branch at least daily with master. Using rebase results in a clean history and is preferable when you are the only one using the branch. Otherwise, merge master into your branch for the latest changes. If you choose to rebase please have a good understanding of it.
Releasing your Software
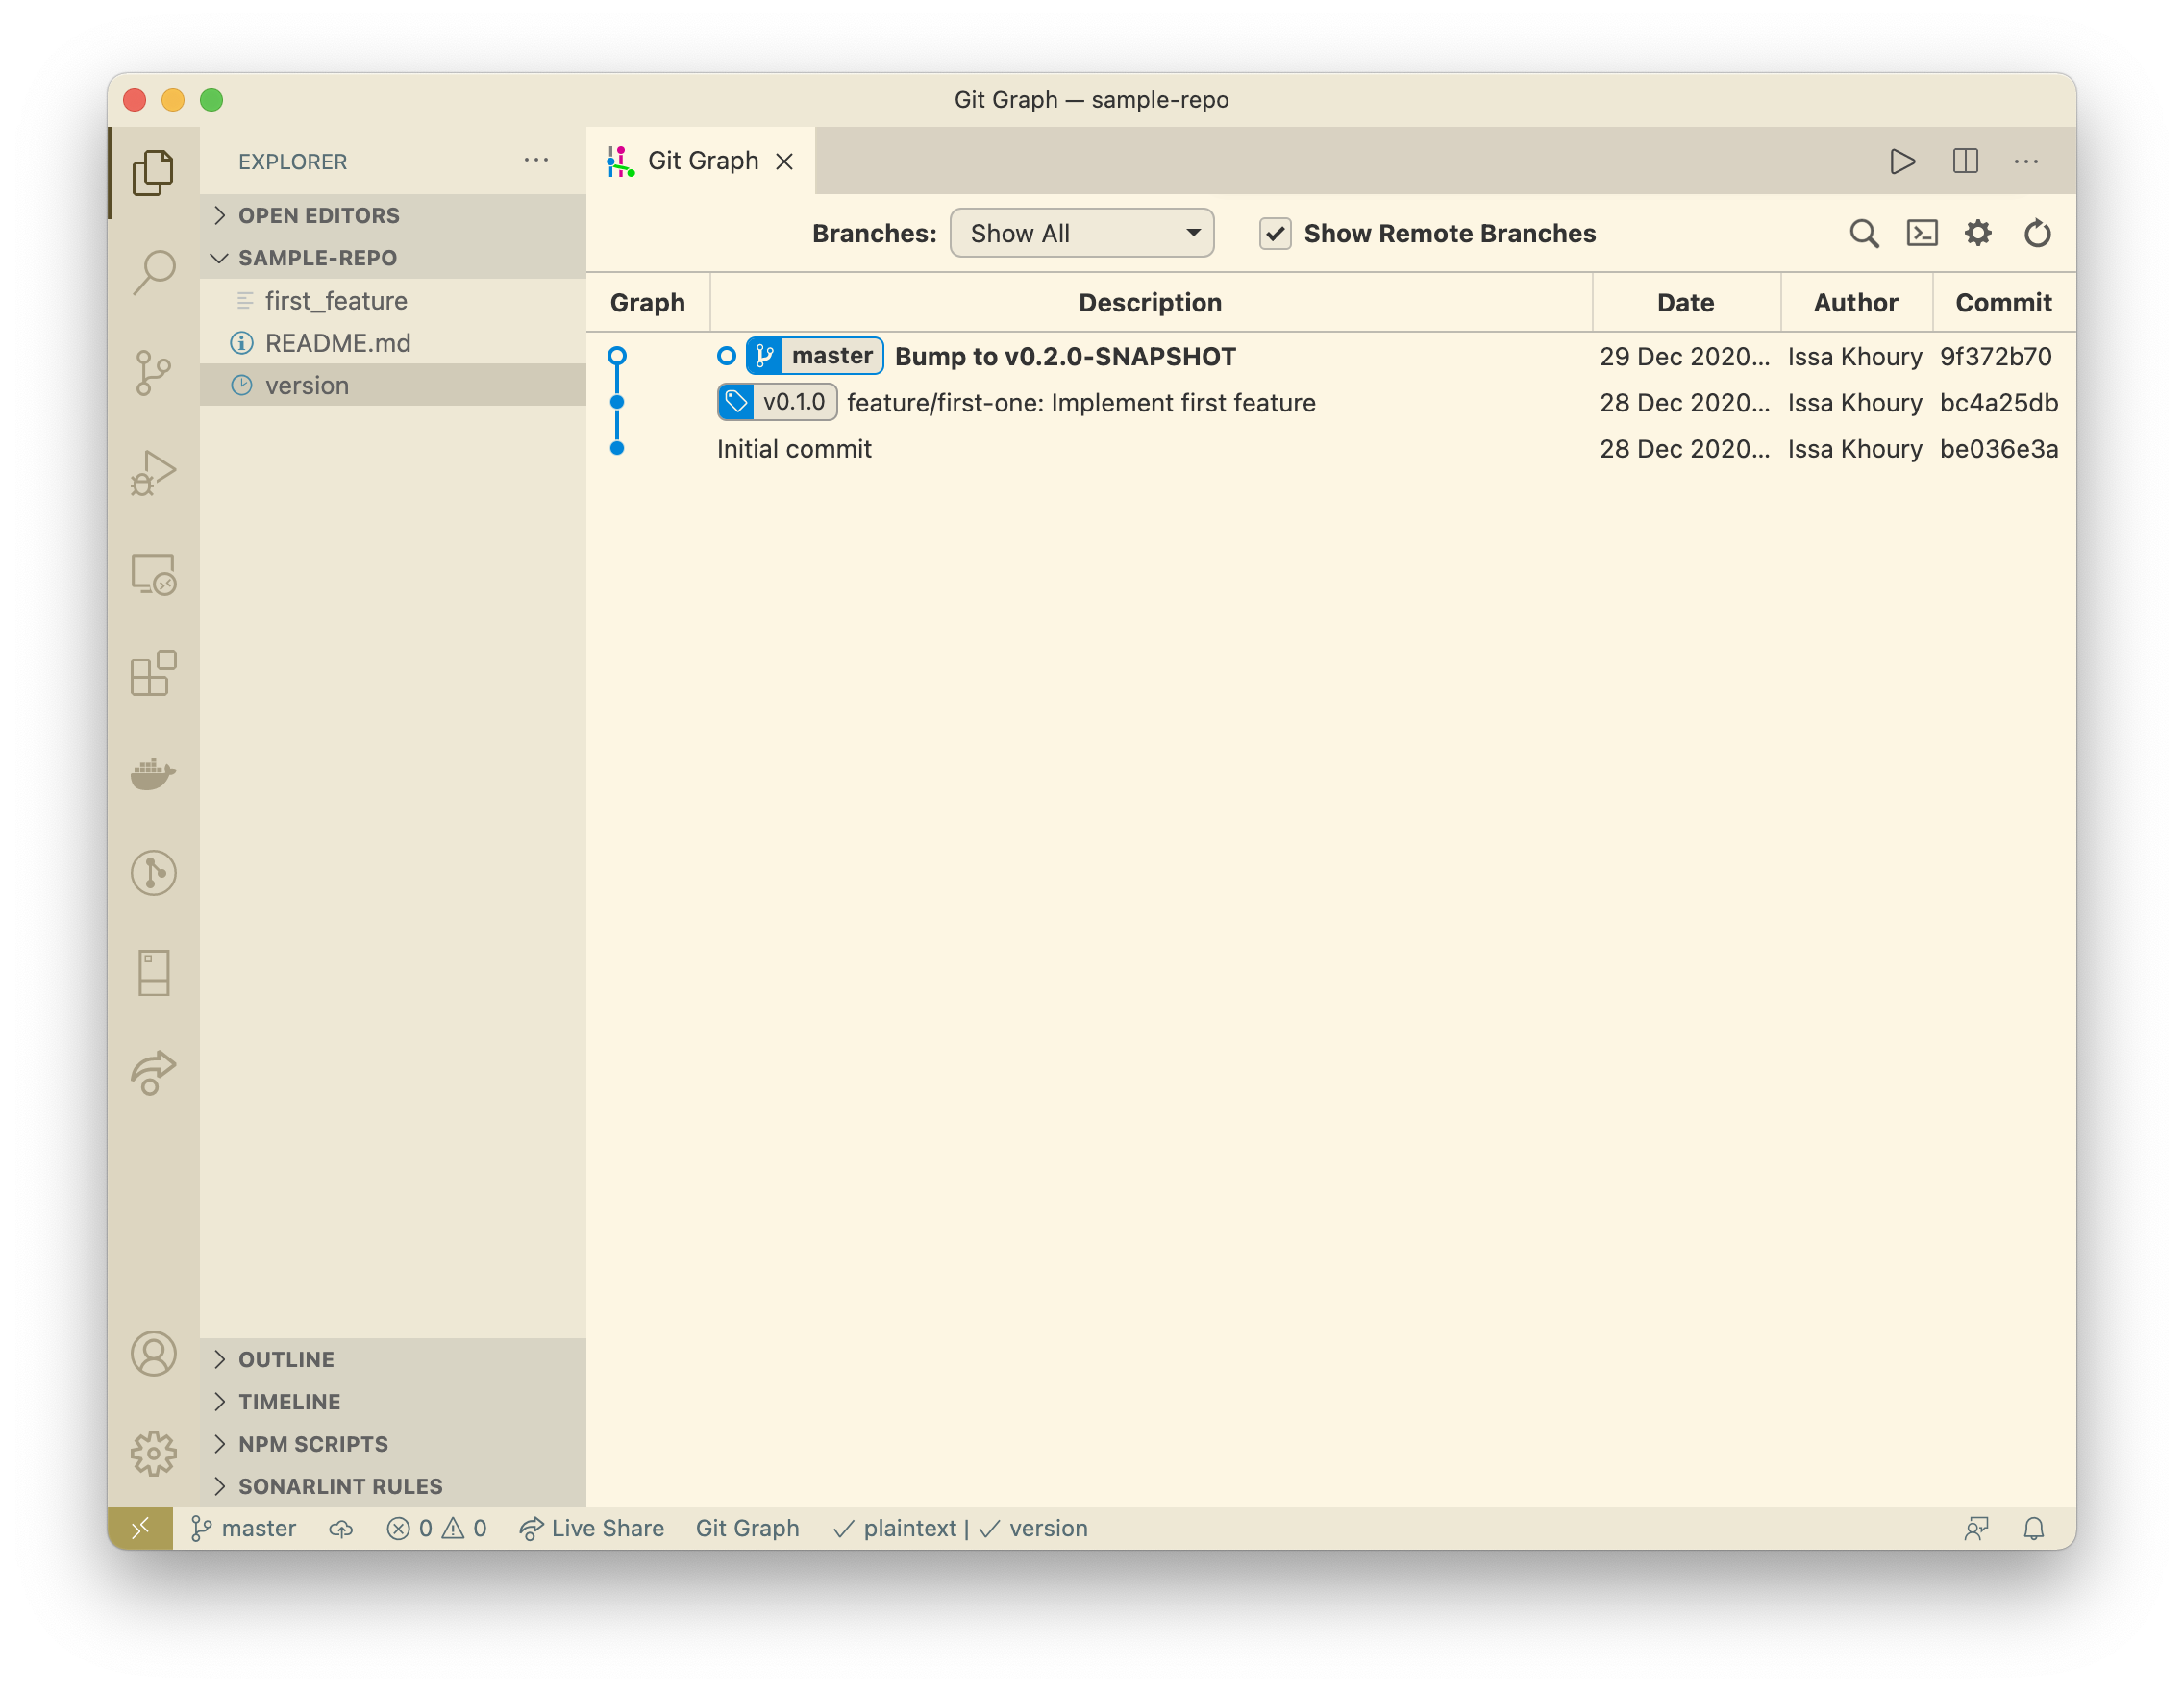
You decide to release the first version of your software into production. It is important to track the different versions that you will eventually release. As a rule of thumb, semantic versioning is the de-facto versioning strategy for software. Since our single source of truth is the master branch and every commit is production ready code, we will cut the release from master. It’s as simple as tagging the commit that represents the release point with the next release version v0.1.0. Now that you tagged your first production release, you need to bump the version to the next minor one so that all future commits will target the v0.2.0-SNAPSHOT version. The SNAPSHOT label indicates that the version is currently under development and can be updated with future changes. Once the version is deemed stable, the SNAPSHOT label is removed and that version of the software is frozen.
Patching the Release
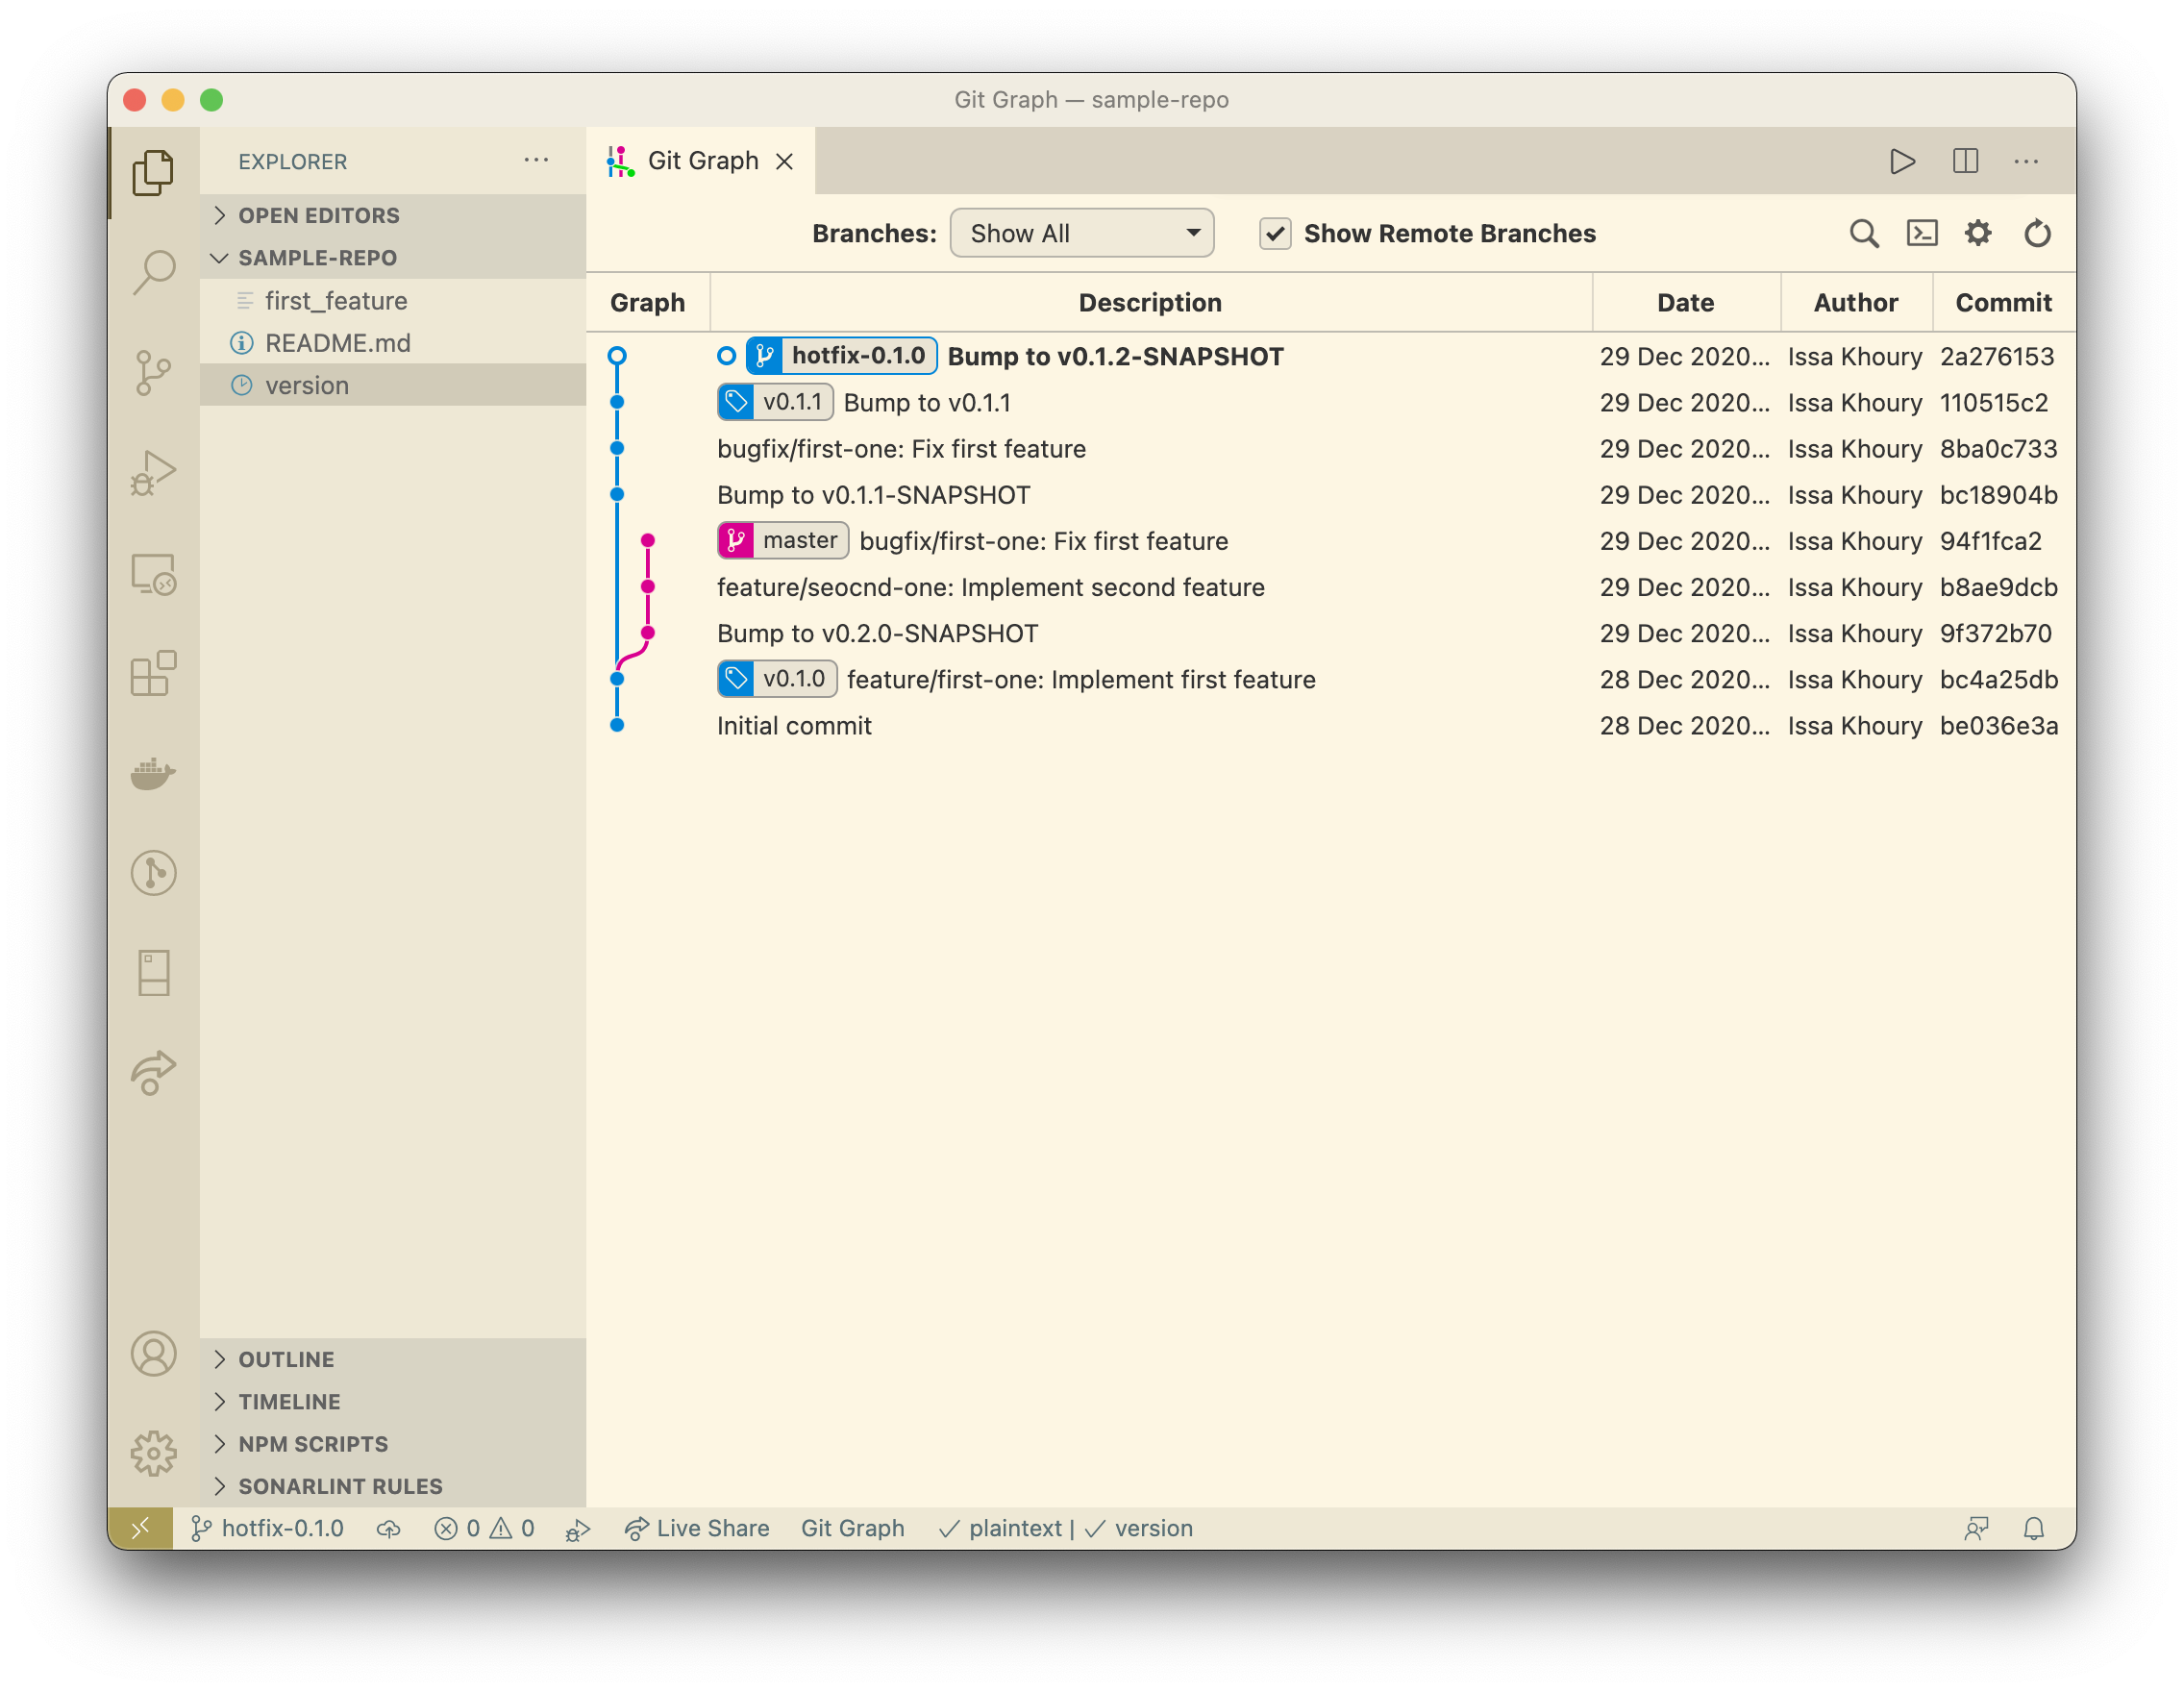
What happens if a major bug is discovered in production and the patch cannot wait for the next scheduled release? Your master branch is already ahead and might contain code that should not be released yet. In the event that we cannot release our patch directly from master, we create a special hotfix branch. If possible, we first try to patch our code on the master branch. This makes sure that the fix is also included in the next production release. We then cherry pick our fix onto our new hotfix branch. If it’s not feasible to do so, you can apply the patch directly onto the new hotfix branch. Make sure that the bug is eventually fixed for the next scheduled release from master.
First, branch out from the last release point into a new hotfix-0.1.0 branch. Next, bump the version to the next patch snapshot version v0.1.1-SNAPSHOT. Then, commit the fix either from master or your bugfix branch. Finally, create a new release from the hotfix branch with the patch version v0.1.1. You can now safely deploy the new patched version into production, while continuing to work on the next scheduled release with no disruption.
Git Cheat Sheets
Step-by-step instructions for each scenario. Each phase assumes you are in an up-to-date master branch.
Cheat Sheet: Initial Commit
mkdir my-projectcd my-project/git init- Create a
README.mdfile and set your initial version tov0.1.0-SNAPSHOT git commit -am "Initial commit"
Cheat Sheet: First Feature
git switch -c feature/first-one- Add new feature
git commit -am "Implement first feature"- Create PR for review and merge your changes into master. Squash merge into master using
git merge --squash --no-commit feature/first-one
Cheat Sheet: Releasing your Software
- Bump to next release version
git commit -am "Bump to v0.1.0"git tag -a v0.1.0 -m "Release v0.1.0"- Bump to next snapshot version
git commit -am "Bump to v0.2.0-SNAPSHOT"
Cheat Sheet: Patching the Release
git checkout v0.1.0git switch -c hotfix-0.1.0- Bump to next snapshot version
git commit -am "Bump to v0.1.1-SNAPSHOT"- Integrate fix from master or bugfix branch
- Bump to next patch version
git commit -am "Bump to v0.1.1"git tag -a v0.1.1 -m "Hotfix v0.1.1"- Bump to next snapshot version
git commit -am "Bump to v0.1.2-SNAPSHOT"